The installation of Fiber-Life fiber optic patch panels is a meticulous process, elegantly divided into three distinct stages: mounting the panel on the rack, carefully introducing fiber optic cables, and strategically planning the cable paths. This method ensures a robust and organized fiber optic wiring system, particularly beneficial in high-density environments such as data centers and server rooms.
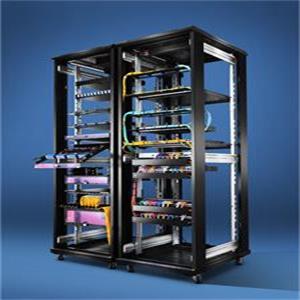
In today’s technologically advanced landscape, Fiber-Life fiber optic patch panels have risen to prominence within optical fiber infrastructure, offering unparalleled convenience and protection for optical fiber cables. Their innovative drawer-style design not only facilitates high-density cabling but also enhances cable management, a crucial aspect in maintaining the integrity and performance of fiber optic networks.
Given the delicate nature of fiber optic cables, which are susceptible to damage from excessive pulling, bending, or compression, the installation process requires a level of precision and care that Fiber-Life is committed to providing.
Step-by-Step Installation Guide for Fiber-Life Fiber Optic Patch Panels:
- Mounting the Fiber Optic Patch Panel on the Rack
- The initial stage of installation is straightforward. Attach the brackets to either side of the Fiber-Life fiber optic patch panel, then secure these brackets to the designated positions on the rack using screws, as depicted in the accompanying diagram. Prior to installation, ascertain the preferred orientation of the optical distribution box to align with your specific requirements.
- Introducing Fiber Optic Cables into the Patch Panel
- With the Fiber-Life patch panel securely mounted, the next phase involves threading the fiber optic cables through the designated cable entry points. Employ a suitable protective sheath to guide and secure the cables within the panel. Fiber optic trunk cables, typically pre-terminated with branch fiber jumpers or pigtails, are used for this purpose.
- The front panel of the Fiber-Life patch panel is designed to be retractable, necessitating an adequately lengthy trunk cable to prevent strain when fully extended. As illustrated, ensure a minimum cable length of 31 inches between points A and B to avoid excessive tension. Utilize cable ties at points A, B, and other strategic locations within the patch panel to secure the cables, with movable cable ties as shown in the figure. Single branch cables may forgo the use of cable ties for simplicity.
- Planning the Cable Path
- After securing the main trunk cable, proceed to route the branch optical cables. Connect each pre-terminated fiber optic pigtail to the adapter panel, ensuring a precise match between the ports. Then, using a bending radius control clip, attach the optical fiber adapter panel to the front panel of the distribution box. Throughout this process, exercise caution to respect the minimum bending radius of the optical cables to preserve their structural integrity and performance.
In conclusion, the Fiber-Life fiber optic patch panel installation is a testament to the brand’s dedication to quality, precision, and innovation. By following these detailed steps, you can ensure a seamless and secure fiber optic network that stands the test of time.