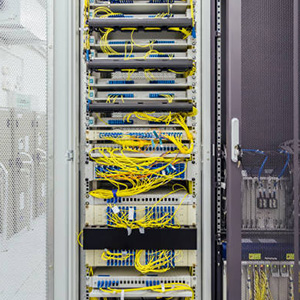
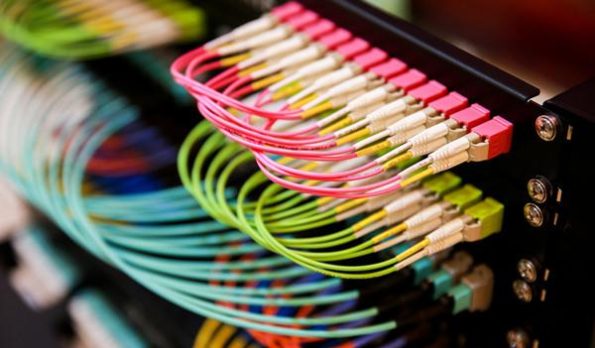
Standardized fiber optic patch cords can make the optical cable look neat, facilitate future project maintenance, and make it easier to find your fiber or locate faults. This is a good thing that will last forever.
1. What is a fiber optic patch cord?
Fiber optic patch cord are mainly used to connect network devices at both ends, and are mainly used in the following three scenarios.
- Between devices
- Between devices and fiber distribution frames
- Between fiber distribution frames
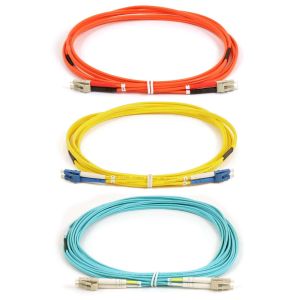
Classification of fiber optic patch cords
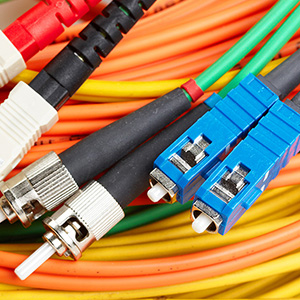
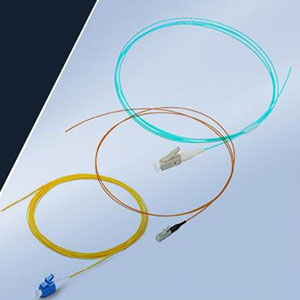
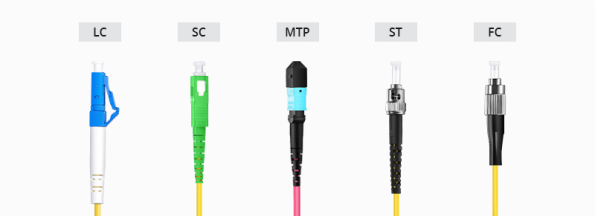
Classification by fiber interface
- FC connector: Uses a metal sleeve for external reinforcement and is fixed with screw fasteners. Generally used on ODF (most used on MDF)
- SC connector: Connects GBIC modules, its shell is rectangular, and the pin lock is fixed without rotation. (Most used on routers and switches)
- ST connector: Commonly used in ODF, the shell is round and fixed with screw fasteners. (ST is usually used for 10Base-F.)
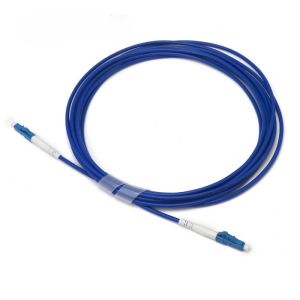
- LC connector: Used to connect SFP modules, it is made of an easy-to-operate modular jack (RJ) locking mechanism. (Commonly used in routers)
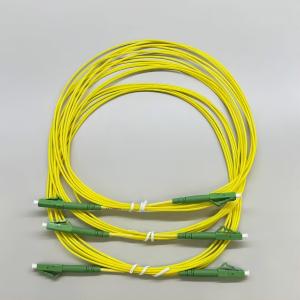
According to the length
1.5m, 2m, 3m, 5m, 10m, 15m, 20m are available, and can also be customized.
According to the usage
- LC interface is usually used between devices.
- FC interface is often used in ODF to connect the remote core.
- SC interface is often used in ODF and equipment.
2. What are the layout principles of fiber optic patch cords?
In order to reduce the difficulty of subsequent operation and maintenance, it is best to follow the following principles during deployment.
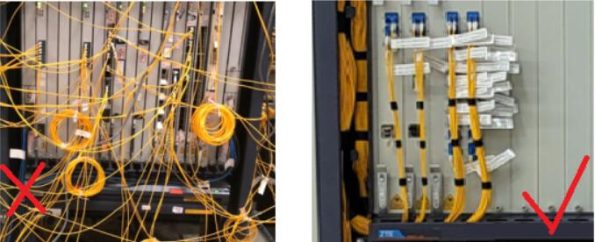
- The operation of fiber jumpers must follow the principles of less crossover, neat and beautiful wiring, easy operation, and less space.
- The length of the fiber jumper must be controlled within the remaining length of 500mm.
- Patch cables of inappropriate length shall not be used, and flanges are not allowed to connect two sections of patch cables.
- Each fiber fiber optic patch cord should ensure that the radius of curvature is greater than 400mm at all locations.
- Connect one end of the optical fiber to the device port, pass the other end through the wiring trough, pull out the fiber tray, wind the excess optical fiber into a circle, lay it on the fiber tray, wrap it with a fiber tie, and push it onto the fiber tray, and connect the other end to the device or ODF rack.
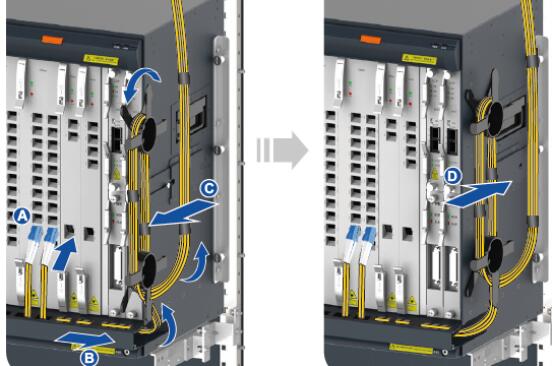
- General requirements for fiber optic cabling: ① For fiber optic cabling from the top, arrange the cable downward on the outside of the ODF rack, select the most suitable disk fiber column with the remaining fiber, and route it upward on the inside of the ODF rack, horizontally along the bottom edge of the rack ODM, and vertically upward to the corresponding terminal. ② A fiber jumper is only allowed to go up once (along the outside of the ODF rack) or up once (along the inside of the ODF rack) in the ODF rack. It is prohibited to entangle, cross, or hang between multiple fiber optic columns, that is, no fiber optic winding is allowed on the top edge of each fiber column. ④ All jumpers must be laid in the ODF cabinet, and it is strictly prohibited to lay or fly outside the cabinet.
- Do not wrap a fiber between multiple fiber trays.
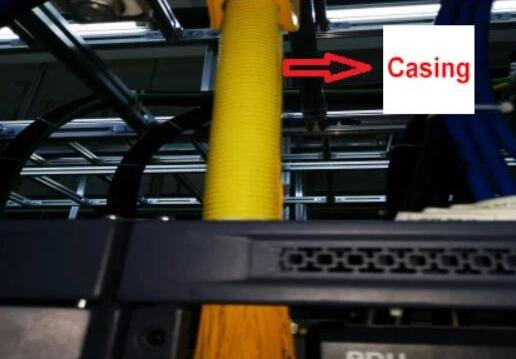
- When the fiber passes through the cabinet, use a sleeve to protect the fiber from being squeezed by other cables. If there is a distribution frame, lay the fiber in the distribution frame.
- When connecting optical fiber, do not pull it too tight and make the connector at a right angle.
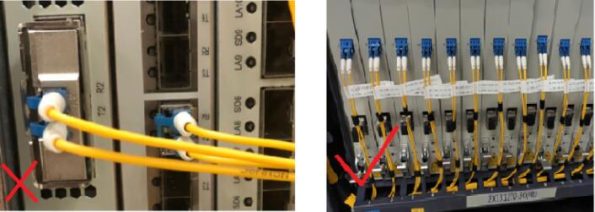
- All optical fibers must be laid in the wiring trough. Do not lay optical fibers or spread cables outside the rack.
- Do not use an insufficiently long fiber. Do not use an adapter to connect two fibers.
- Clean the fiber end face when inserting it. In a production environment, do not touch the fiber end with your hands or let the fiber end touch objects.
- When connecting the fiber, insert the optical connector vertically into the optical port. The entire fiber connector should be inserted into place. Commonly used SC and LC connectors will have a click sound indicating that they are in place.

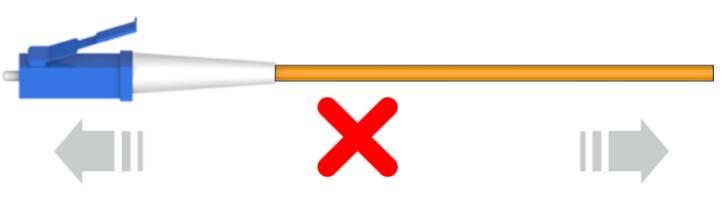
- Do not pull the optical fiber forcibly. Otherwise, the optical fiber and connector may break.
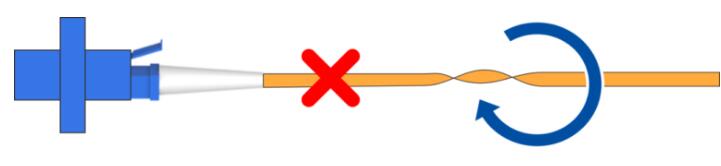
- Do not twist the fiber. To avoid twisting the fiber, coil the fiber according to its natural slack.
What is the process of laying out fiber optic patch cords?
After understanding the concept and wiring principle of fiber optic patch cords, you can start laying out fiber optic patch cords, which includes six steps:

- Preparation
Prepare tools, materials and hardware information according to business needs.
Tools: marker pen, sleeve, label, oil pen, notepad, pliers, electrical tape.
Materials: optical fiber, optical module, optical fiber binding tape (nylon adhesive tape), the quantity, model or length of the corresponding materials depends on the needs.
Hardware preparation: Understand the IDC, the location of the equipment, ODF, and record them.
Get tapes of various colors to distinguish the fiber jumpers for different purposes. - Select optical fiber
Select the appropriate optical fiber according to the interface type and length.
Select the corresponding optical fiber according to the interface, beam splitter, and flange head on the fiber splitter box.
Select the length of the optical fiber so that the margin of the optical fiber length is within 50 cm. - Lay the optical fiber
Arrange the optical fiber according to the rules of the optical fiber jumper.
Find the port, splitter or optical fiber splitter.
Remove the optical fiber connector.
Insert the connector at one end of the optical fiber into the corresponding device port.
Lay the optical fiber along the routing area to the corresponding device.
Insert the connector at the other end of the optical fiber into the corresponding device port. - Stick labels
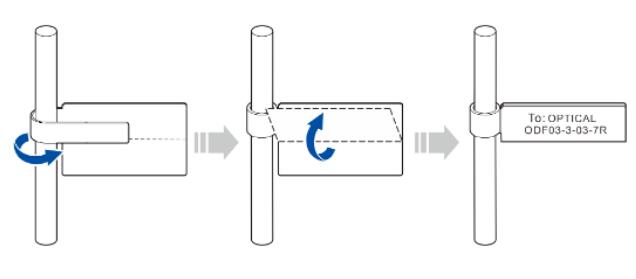
To facilitate equipment maintenance, labels should be affixed at both ends of each optical fiber 1cm~2cm away from the connector.
All optical fiber labels must be machine-marked, and handwriting is not allowed.
When multiple optical fibers are placed at the same time, first mark the optical fibers with a marker to avoid confusion, and stick the optical fiber labels after placement.
Both ends of the optical fiber need to be marked.
After sticking, the labels should face the same direction. For vertical cables, the head of the label usually faces left. For horizontal cables, the head of the label usually faces down.
- Bundling optical fibers
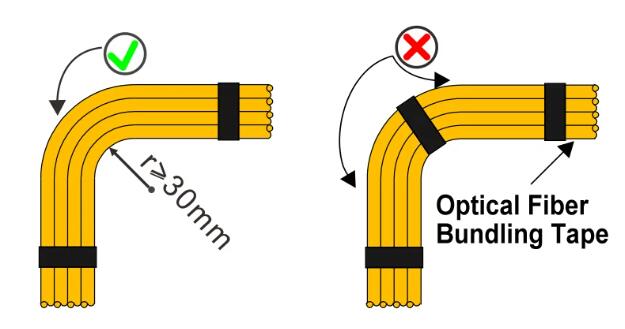
Use optical fiber bundling tape to bundle optical fibers at a certain distance.
When bundling optical fibers, the distance between the bundling tapes is 20 cm.
When the optical fiber turns, tie the bundling tapes on both sides of the corner to prevent the fiber core from being broken due to excessive force at the bend. The bending radius of 2mm optical fiber cannot be less than 30mm. The bending radius of 3mm optical fiber cannot be less than 40mm.
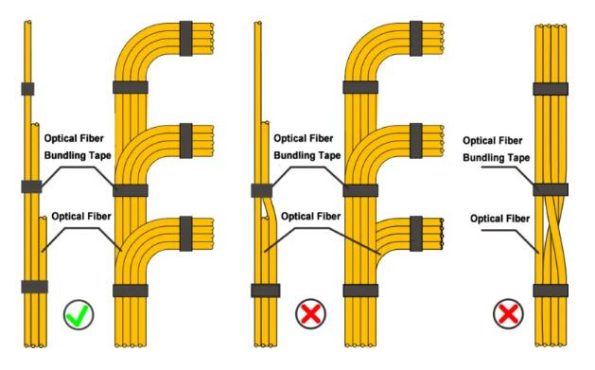
- The contact surface between the strapping tape and the optical fiber is a rough surface, and the hook surface of the strapping tape does not contact the optical fiber.
- The optical fiber should be straightened before bundling. Optical fiber strapping tape The optical fiber should be tied tightly. Do not tie the optical fiber too tightly. Do not cross the optical fiber.
- Finishing work
Tool sorting: sort the tools used during installation to the designated location.
Residue recycling: recycle the project residual materials.
Clean up debris: clean up the garbage generated by the installation and ensure a clean environment.
Complete the installation report: forward the on-site installation report to the relevant person in charge. If the site is running normally, notify the operation and maintenance personnel that the fiber jumper has been completed.
Standardized fiber jumpers can make the optical cable look neat, facilitate future project maintenance, and make it easier to find your fiber or locate faults. This is a good thing once and for all.