In the realm of fiber optic communication systems, the installation and adjustment of optical attenuators can sometimes present a challenge. As a leading fiber optic manufacturer, Fiber-Life has observed a variety of issues encountered by users when dealing with these devices. The uncertainty and frustration of engaging with new technology can be overwhelming, but fear not! This comprehensive guide will walk you through the process step by step, ensuring clarity and ease in your use of Fiber-Life products.
Preparation Before Installation
Tools and Equipment Preparation
Thorough preparation is imperative before commencing the installation of an optical attenuator. Assemble all necessary tools and equipment, such as a fiber cleaver, fusion splicer, optical power meter, and connector cleaning tools. These are the cornerstones of a seamless installation. Equally important is a thorough review of the optical attenuator manual, which outlines specific requirements and precautions.
Environmental Check
Maintaining a pristine and dust-free environment is crucial for installation. The presence of dust and contaminants can significantly impair fiber connection quality. Utilize an anti-static mat to mitigate the risk of static interference and protect your equipment from potential damage.
Fiber and Connector Inspection
Inspect the fiber and connectors meticulously. Examine the fiber for any signs of physical damage or contamination, as even minor imperfections can degrade the transmission quality of the optical signal. Ensure that the connectors are clean and free from damage, focusing on the plugs and sockets to guarantee their surfaces are devoid of dirt or oxidation.
Installation Steps
Connector Cleaning
Commence the installation with a thorough cleaning of the connectors using specialized tools. Avoid direct contact with the end faces to prevent contamination from oils and sweat, which can adversely affect optical signal transmission.
Fiber Cleaving
Proceed to fiber cleaving, ensuring a smooth and burr-free end face for optimal signal transmission. Post-cleaving, securely connect the fiber to the attenuator’s input and output ends, verifying the connections for tightness and stability.
Adjustment Steps
Initial Testing
Post-installation, perform an initial test with an optical power meter to gauge the optical power at both ends of the attenuator. Document these values for subsequent comparison, providing a baseline for the attenuator’s performance.
Adjusting the Attenuation Value
Fine-tune the attenuation value in accordance with the system’s specific requirements. For variable attenuators, incrementally adjust the value while monitoring the optical power in real-time, achieving the desired attenuation level with precision.
Precise Calibration
Pay keen attention to the optical power meter readings during adjustment. Record each adjustment and recalibrate until the attenuation value aligns with the system’s precision standards, ensuring stable operation.

Verification and Testing
Repetition Testing
Conduct repetition testing to verify the attenuator’s performance consistency. By repeatedly connecting and disconnecting the attenuator, confirm that the attenuation values remain stable, indicating reliable performance.
Long-term Stability Testing
Assess the attenuator’s long-term stability by observing any changes in the attenuation value over an extended period. Regular recordings of optical power changes will evaluate the device’s endurance and reliability.
Environmental Impact Testing
Evaluate the attenuator’s performance across various temperature and humidity conditions to ensure robust operation in diverse environments.
Daily Maintenance
Cleaning After Each Use
To prolong the attenuator’s life and preserve performance, conduct daily maintenance. Post-use, promptly clean the fiber connectors and attenuator joints to prevent the accumulation of dust and contaminants.
Regular Inspection and Calibration
Routinely inspect and clean the heating elements to prevent grease buildup. Use soft cloths for cleaning and replace worn parts regularly to uphold the device’s optimal performance.
Maintenance of Accessories
Employ soft materials for accessory cleaning to avoid surface damage. Replace accessories as needed and maintain detailed records for tracking device status and performance.
Common Issues and Solutions
Unstable Connections
Address unstable connections by ensuring clean and intact fiber connectors and secure attenuator connections. Clean and reconnect for stable attenuation values.
Inaccurate Attenuation Values
Calibrate the optical power meter and verify the attenuator’s adjustment mechanism for accurate attenuation values. Repeated calibration ensures precision.
Excessive Signal Loss
Inspect for fiber line bends or damage and clean connectors and joints to minimize signal loss.
Conclusion and Product Recommendation
The detailed steps outlined herein provide a comprehensive understanding of optical attenuator installation and adjustment. Proper execution enhances the efficiency and stability of the attenuators and the overall communication system. Regular maintenance and prompt troubleshooting extend the device’s life, ensuring long-term stability.
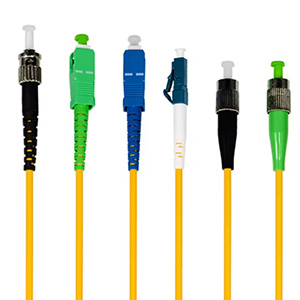
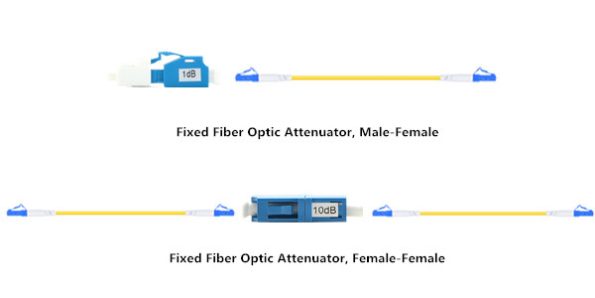
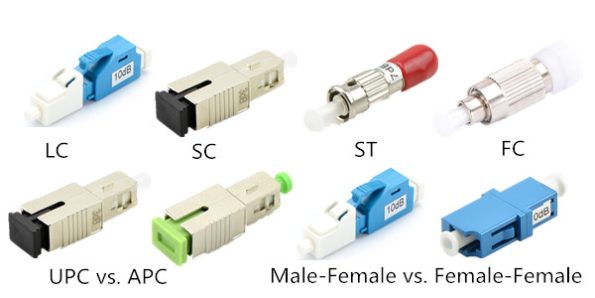
For superior optical attenuators, trust Fiber-Life. We offer a diverse range of attenuators with various connector types and polishing options, catering to both standard and customized needs. Experience our high-quality products, professional customer service, and technical support. Explore Fiber-Life for tailored fiber optic solutions.