FREE SHIPPING On Orders Over US$200
A poor cleave can interrupt a fiber splicing job before the fibers are joined. Contamination, incorrect positioning or blade condition can leave an end face that needs to be prepared again.
Learning how to use a fiber cleaver starts with a clear sequence: strip, clean, position, cleave and check. This guide covers precision cleavers used to prepare individual optical fibers. Loading procedures and adjustment methods vary by model.
1. What Does a Fiber Cleaver Do?
A fiber cleaver prepares an optical fiber’s end for fusion splicing or compatible field-installed connectors. Common precision cleavers score the glass and apply controlled stress to separate it.
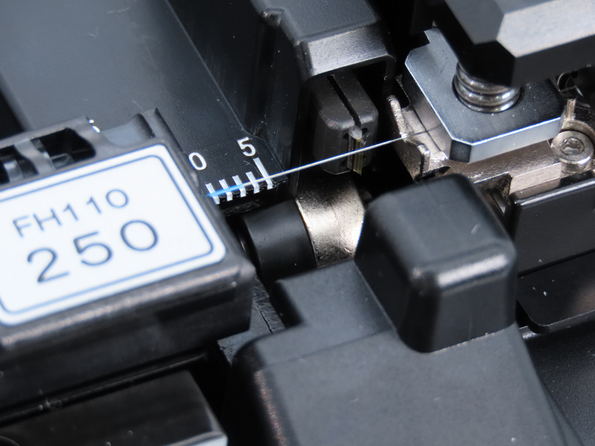
The goal is an end face suitable for the next connection step. A cleaver does not strip the fiber coating or join fibers together: those tasks require separate tools.
2. Before You Start
Check that the cleaver and its holder support the fiber you are preparing. Glass diameter, coating or buffer size, and holder configuration all matter.
Have the following ready:
- A suitable fiber stripper.
- Lint-free wipes and the recommended fiber-cleaning fluid.
- The required strip and cleave lengths.
- A fiber-scrap collector or dedicated sharps container.
Strip length is the amount of coating removed. Cleave length is the prepared fiber length required by the splicer or connector, measured from the reference specified for that equipment. These are not necessarily the same.
Work on a stable, clean surface. Wear safety glasses, keep food and drinks away, and never pick up glass scraps with bare fingers.
3. How to Use a Fiber Cleaver Step by Step
3.1 Strip the Fiber
Remove the coating over the required length using an appropriate stripper. Removing the cable jacket or buffer alone may leave a coating layer around the glass.
The section to be cleaved must be prepared as required by the tool. Residual coating can prevent normal cleaving. If stripping damages the glass, remove the damaged section and start again.
3.2 Clean the Exposed Fiber
Clean the stripped fiber with a lint-free wipe and an approved cleaning fluid, commonly high-purity isopropyl alcohol. Allow it to dry before loading it into the cleaver.
Avoid touching the cleaned glass or resting it on the workbench. Cleaning before cleaving helps prevent coating residue from contaminating the tool and affecting preparation.
3.3 Position and Clamp the Fiber
Place the fiber in the correct holder or guide. Set the required cleave length using the appropriate scale, stop or holder position.
Keep the fiber in its intended path without twisting or pulling it. Close the clamps in the sequence specified for the cleaver.
If the fiber moves or will not sit correctly, check the holder and loading position before continuing.
3.4 Perform the Cleave
Operate the lever or blade carriage through its normal cycle. Some cleavers combine several actions in one movement; others require separate steps.
Do not add extra pressure or force the mechanism. If the fiber does not cleave, stop and check preparation, loading and tool condition before trying again.
3.5 Transfer the Fiber and Check the Result
Release the fiber carefully, handling it by its coated section or holder. Keep the freshly cleaved end away from fingers, tools and surrounding surfaces.
Transfer it promptly to the splicer or connector assembly. Contact during transfer can damage a prepared end face.
For fusion splicing, review the fiber image and any cleave-related warnings before proceeding. If the end is unacceptable, prepare and cleave the fiber again. Follow the specified preparation and inspection procedure for field-installed connectors.
Ensure the offcut enters the scrap collector. Collect any loose fragments with an appropriate tool and place them in the dedicated container.
4. Common Mistakes and What to Check
Poor results do not automatically mean that the blade needs replacement. Check preparation, loading and cleanliness first.
| Problem | Possible cause | What to check |
|---|---|---|
| Fiber does not cleave | Coating remains, incorrect loading or blade condition | Confirm the fiber is properly stripped and positioned |
| Cleave length is incorrect | Wrong reference point, setting or holder position | Recheck the equipment’s required length and measurement reference |
| Results vary between attempts | Dirty clamps, fiber movement or blade wear | Check cleanliness and secure positioning |
| Splicer reports a cleave-angle error | An unacceptable end face or an inspection issue | Review the image and follow the splicer’s troubleshooting instructions |
| End face becomes damaged during transfer | Contact with a tool, surface or component | Prepare a new end and keep the transfer path clear |
Clean the cleaver’s clamps, blade and other specified surfaces according to its maintenance instructions. Do not touch the blade edge with your fingers. Fujikura’s guidance for applicable models includes cleaning the clamp pads, anvil and blade, followed by checking the resulting cleaves.
If problems persist, consult the manual before rotating the blade or changing its height. Adjustment procedures and replacement criteria differ between models.
5. Conclusion
Consistent fiber cleaving depends on clean preparation, correct positioning and careful handling of the finished end. Follow the required lengths, check the result and address basic preparation issues before changing blade settings.
When choosing a tool, compare its supported fibers, holder options and cleave-length range. Browse Fiber-Life’s Fiber Cleavers, or review the Fujikura CT-16 specifications to check whether its configuration suits your work.